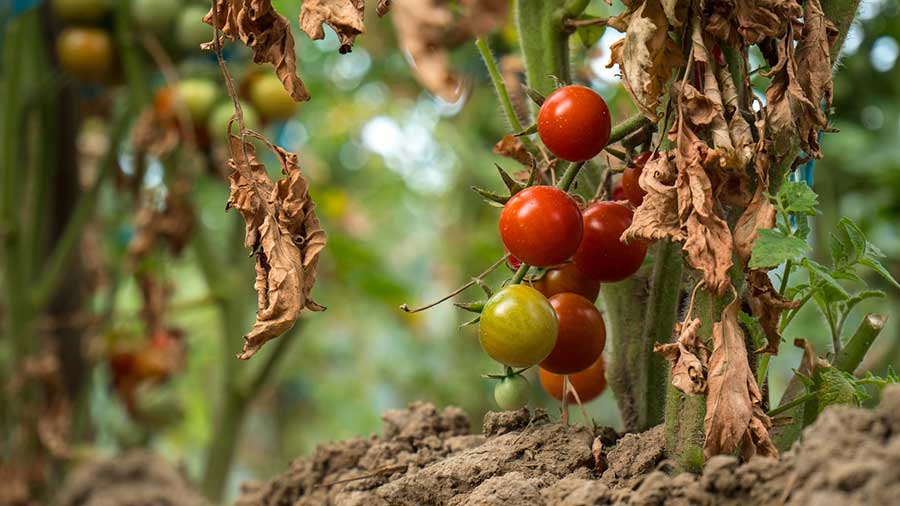
My first time planting tomatoes was back in high school when it was part of my gardening class. Now, it has become a mainstay in my container garden. However, planting tomatoes is not without its problems. One common problem I encounter is when the leaves of my tomato plant start turning yellow.
This problem appears in all varieties of tomato plants that I plant in containers, such as Roma, Beefsteak, and Heirloom tomatoes. Recently, I noticed this problem in one of my cherry tomato plants. Why are the leaves of my cherry tomato plant turning yellow?
I did some research, and the common causes are:
- Sunlight-deficiency
- Nitrogen-deficiency
- Magnesium-deficiency
- Presence of pests
- Watering problems (under and over-watering)
1. Sunlight Deficiency
Sometimes the cause is just simple, it just needs more sunlight. Tomatoes, as well as peppers and eggplants, love heat and light and they love sunny spots with warm soil best. If only the bottom leaves are turning yellow, then there is really nothing to worry about.
Newer leaves on the top portion of the plant may just be blocking the lower leaves from receiving the full light of the sun.
How to fix it
Simply transfer your tomato plant to a spot where it can receive more than 6 hours of sunlight. Check if the yellowing is spreading to the upper leaves. If not, then you are ok. You can simply pick them off and use them as a top dressing. Topdressing is the process of placing organic materials on the topsoil which will then serve as organic fertilizer.
2. Nitrogen Deficiency

Speaking of fertilizer, one important nutrient that a plant must have is nitrogen. Nitrogen is needed by plants to produce chlorophyll, which makes the leaves green.
Chlorophyll, which is a green pigment, is present in all green plants and is responsible for the absorption of light to provide energy for photosynthesis. Without photosynthesis, they can’t make their own food so they eventually die.
How to fix it
If the yellowing of leaves is spreading, then it is time to add fertilizer. For instant effect, use synthetic fertilizers.
They're faster acting than organic making them a good choice for aiding plants in severe distress from nutrient deficiencies. They usually come as dry, granular pellets or water-soluble products.
I only apply synthetic fertilizers in severe circumstances. If the problem is just starting, then I use the organic approach.
Nitrogen-rich organic fertilizer
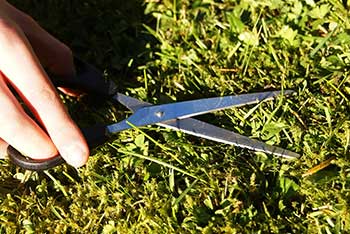
One of my favorite ways to supply nitrogen to my plants is through the use of grass clipping tea fertilizer. This organic fertilizer has been used by many gardeners and farmers for centuries. Aside from being free, it is also very easy to make. You can use grass, shrubs, or weeds you can find in your home.
Collect the clippings to fill half a bucket. Using a pair of scissors, cut the leaves to extract the juice. Place in a bucket or a deep container. Add water to fill the bucket to the top. Cover with paper or cloth or any porous material. This is to avoid insects laying their eggs in the mixture.
Do not use a solid or non-porous material to cover the bucket.
Doing this will rapidly foul your mixture because of lack of air circulation. Let sit for 3-5 days. Be sure to mix it daily for about 2-3 minutes before covering it again. To use, simply strain out the solid particles. Use it to water your plants about 2-3 times a week.
If you don’t have time to mix up some grass and water, you may use green tea instead.
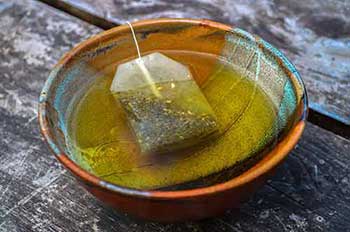
Green tea is rich in nitrogen and has many micronutrients beneficial to plants such as Manganese and Zinc.
Manganese contributes significantly to plants by keeping the leaves greener and preventing diseases in the roots. Zinc also prevents the discoloration of leaves and helps in the development of chlorophyll.
To use, remove the used tea from its bag. Mix in 1 liter of water and let it sit for 1 hour. Pour in the sprayer and spray on all parts of the plant. It can also be placed directly into the soil. It helps protect the roots against bad bacteria. Apply once a week only. Some teas may have caffeine and it can increase the acidity level of the soil.
If you want more ideas on organic fertilizers, check out this blog I wrote here.
3. Magnesium Deficiency
Most plants need additional nutrients like magnesium and sulfur to stay in good health. They make the primary nutrients in most plant foods (nitrogen, phosphorus, potassium) more effective. One of the important secondary macronutrients is magnesium. It helps in the production of chlorophyll which makes the leaves green.
How to fix it

Aside from being added to hot baths and foot soaks to reduce stress, Epsom salt is also known to be beneficial to some plants in some situations.
Primarily, roses, tomatoes, and peppers are some of the plants that can take advantage of the magnesium levels contained in Epsom salts.
Sprinkle Epsom salt once weekly to help nourish your tomato plants. Magnesium sulfate crystals, when added to the soil, provide vital nutrients that help prevent yellowing leaves and the loss of green color (magnesium is an essential element in the chlorophyll molecule) in plants.
Add 2 tablespoons of Epsom salt to a gallon of water and sprinkle on the soil to keep your plant healthy and green.
I also like to spray this mixture onto the leaves, for maximum absorption. Alternately, I add the salt directly to the soil: one teaspoon of salt per each foot of plant height.
As a bonus, the Epsom salt sprinkled around the plant keeps snails and slugs away.


4. Presence of pests

Soft-bodied insects such as aphids, mites, and leaf miners can destroy the plants by sucking plant sap along with its precious nutrients. If not controlled early, they can cause the leaves to turn yellow and being deformed, eventually causing stunted growth.
The presence of leaf miners is easily detected because they make a “roadmap” marking on the leaves, typically yellowish in color.
How to fix it
For a quick DIY solution, I make an oil spray. It’s a mixture of oil and liquid soap. Here’ how I make it:
Ingredients
1 cup of vegetable oil. *if not available, you may use any kind of cooking oil
1 tbsp liquid soap
Jar with cover
Procedure
Mix the oil and soap in the jar. Cover the jar and mix thoroughly. To use, dilute 1 tablespoon of the mixture for every liter of water. Mix thoroughly. You can use this immediately. This is effective for soft-bodied insects such as aphids. The oil spray will coat the body of the soft-bodied insects which will suffocate them.
Apply in the early morning or late afternoon. Use once or twice a week.
For a more potent mixture, I use a chili garlic spray. Here is how I make it:
Ingredients
2 bulbs garlic
1 bulb onion
100 grams chili
1 tablespoon liquid dishwashing soap
1-liter water
Procedure
Blend the chili, garlic, and onion in 1 liter of water. Strain the mixture to remove solid particles. Add the liquid soap. Mix thoroughly. There’s no need to dilute this mixture, you can spray this immediately. Use on leafy plants only. Insects tend to avoid the smell of garlic, even the good ones, so don’t apply on flowering plants.
Apply once or twice a week.
I also wrote a blog on how to get rid of pests naturally. You can check it out here.
5. Watering problems (under and over-watering)

Under-watering and over-watering can also cause the yellowing of leaves. The roots of tomato plants don’t like soggy soil. Worst, they may develop root rot. If the entire root system has already become mushy, it may be too late to save the plant.
How to fix it
Water only when the soil is dry. However, it all really boils down to the type of soil you have. The soil may look dry on top but actually, it is water-logged at the root level. It is important to use well-draining soil in your container to avoid this situation.
One characteristic of good potting soil is that it should be porous. Good porosity provides good air circulation and root development. I wrote a blog on how to improve your potting soil. You can check it out here.
To improve porosity, you may add sand, coco peat, sawdust, or wood chips to your garden soil.
For the type of soil that I have, I’m using a ratio of 4-1-1-1. That is 4 cups soil, 1 cup coco peat, 1 cup wood chips, and 1 cup worm cast. This combination is a cheap, simple, and effective type of garden soil. This potting mix is what I put in small pots or containers.
From my experience, this potting mix soil can be used in most plants. I have been using this to grow my tomatoes as well as herbs, leafy vegetables, and even some ornamental plants like petunias and asters.
As much as possible, whatever mixture you might decide to use, make sure the soil is porous, rich in nutrients, and able to hold water well.
Final thoughts
Tomatoes are the major dietary source of the antioxidant lycopene, which has been linked to many health benefits, including reduced risk of heart disease and cancer. They are also a great source of vitamin C, potassium, folate, and vitamin K.
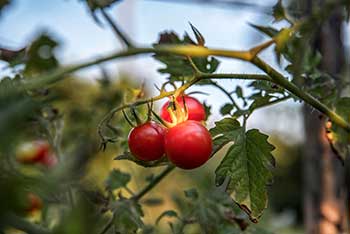
This is why I like planting tomatoes very much, especially cherry tomatoes. Cherry tomatoes are small, round shape, miniature versions of traditional beefsteak tomatoes. These small tomatoes often have a sweeter taste than full-sized tomatoes.
If you can prevent diseases and problems such as leaves turning yellow, then you can have a harvest of fresh tomatoes in 12 weeks.